Historically, in rescue, we’ve attached our two points from the rescuer to the casualty by placing a short-link from the sternal D-ring of the casualty to the carabiner of the descender on the rescuer as the first point (Figure 1), and making the second point from the casualty to the rescuer by placing either persons’ ventral cow’s tail (usually 36″ or so) to the other persons’ ventral connection (Figure 2).
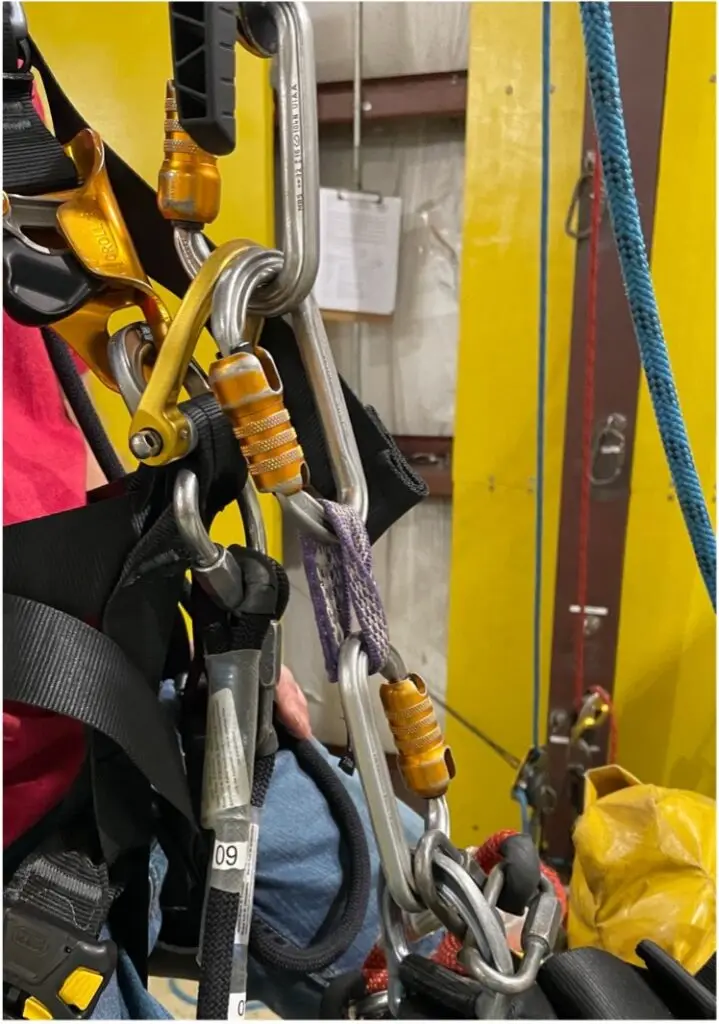
You’ll note, in the Figure 2, that the ventral-to-ventral connection leaves a loop of rope from the rescuer to the casualty. Let’s talk about that loop.
One of the considerations in all of rope access is the ability to limit free-fall distance. Some refer to this as “fall factor”, but the language is changing, and free-fall distance is becoming more common. Limiting the free-fall distance is shortening potential fall distances so that, were a main-line failure to occur, the distance that one would fall is limited to a nominal distance thereby lessening the forces generated and applied to the body.
We are all guilty of occasionally getting caught up on the “normal way” of doing things and don’t fully see the forest from the trees. I think rescues are one of those times. The technique is sound; there is a short connection between the rescuer and the casualty as shown in Figure 1 and, usually, a longer connection, in the form of a cow’s tail, between the ventral connections. If nothing goes wrong, there will be no force generated to either the rescuer or casualty as the short connection is gently loaded with the casualty’s weight and the short link is bomb proof.
But what happens if the short link in Figure 1 does fail? Because of the loop in the cow’s tail in Figure 2, the free-fall distance is about 1/3 length of the cow’s tail (nearly), the stretch in the cow’s tail (about a foot or so), and the harness lengthen and stretch distance (probably about another foot or so) bringing the total free-fall distance to about 3 feet. That’s some ride for a person who is potentially injured in the first place.
I attended the SPRAT conference in Orlando earlier this year and we spoke specifically about this topic in the general meeting and again during the Evaluator Workshop and I got the message. We should always limit the free-fall distance to ensure safety. That means that we should explore alternatives to our normal practices and rescue is one of those that could be adjusted.
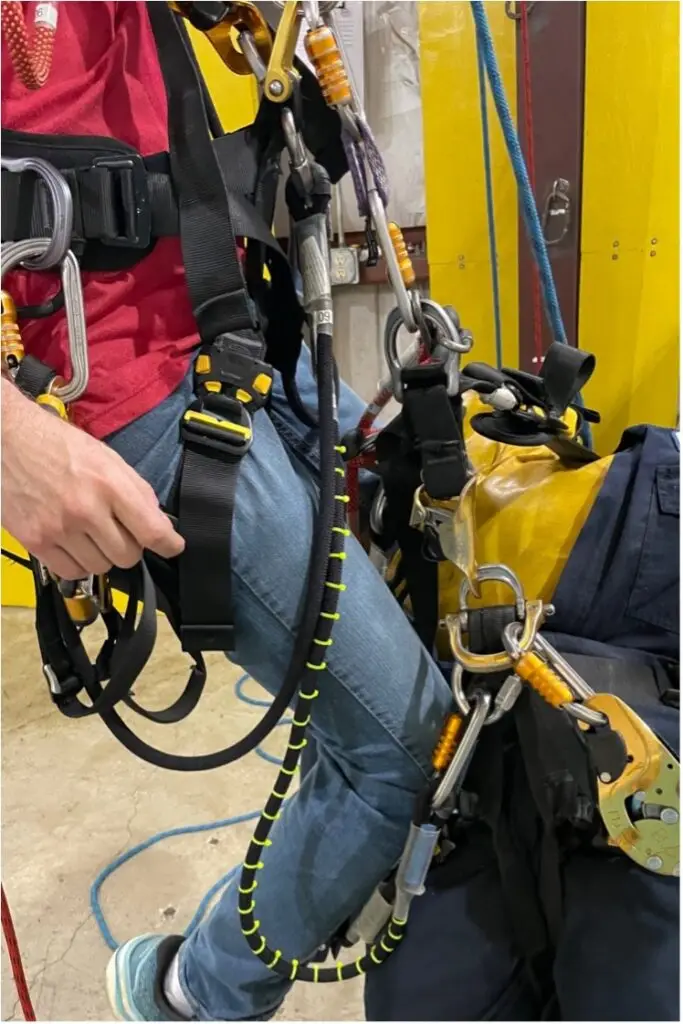
Consider the consequences of not using the arrangement found in Figure 2 and using a positioning device such as the Grillon. If the positioner is placed in the same connections as the cow’s tail in Figure 2, and left loose, we have the same problem (Figure 3) with limiting free-fall potential as if we used the cow’s tail but worse because now the connection is most likely a static rope connection which will impart a higher impact load onto the casualty.
That won’t work so we must remember what we’re trying to accomplish which is to limit free-fall distance. To limit the free-fall distance, the positioner must be tightened when we make the connection as shown in Figure 4.
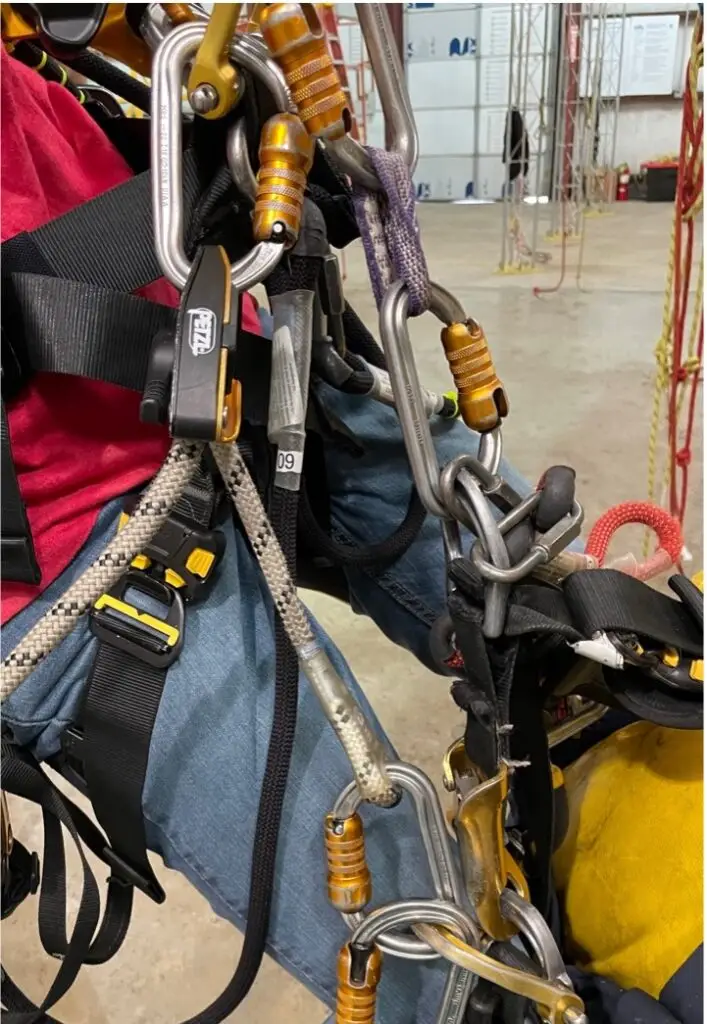
Consider the free-fall distance in this scenario. The main connection breaks and the casualty falls. The casualty must fall the distance of the slack in the system (nearly zero; reposition hardware in line with each other), rope stretch within the system and harness stretch, less than 1 foot, and that’s it.
In conclusion, using a positioner in place of the dynamic cow’s tail during a rescue is an effective way of limiting free-fall distance if the positioner is tightened prior to descent. To effectively use this method, the rescuer should do the following:
- Approach the casualty and make the primary connection between the sternal connection of the casualty to the carabiner of the descender on the rescuer.
- Attach a positioning lanyard between the ventral connections for the two individuals.
- Lower the casualty onto the main connection described above.
- Tighten the positioning lanyard.
- Remove the casualty’s gear from the ropes.
- Descend with the casualty
This is one method of limiting the free-fall distance during a rescue, there are several others. In future articles, we’ll discuss these as well as making alternate connections during a transfer rescue. Please follow us on our social media channels and bookmark our website where you can find a trove of information regarding rope access and nondestructive testing.